

This week I take a look at how to exchange profiles and ingredients between the desktop version of BeerSmith and the web based version. These features were added as part of the BeerSmith 3.2 release and BeerSmith Web release.
These features are also covered in a video tutorial on web based profiles and ingredients here.
Profile and Ingredient Exchange
Prior to the BeerSmith Web and 3.2 release of BeerSmith, you could only exchange recipe data using the cloud folder feature on BeerSmith desktop and mobile. Now you can also exchange profiles and ingredients which lets you easily upload and access custom equipment profiles or ingredients from your desktop version, web version or other machines. I will show how to do it below.
Matching Add-ons and Preloaded Ingredients
Before you start exchanging data, I recommend you check your add-ons on the desktop version and pre-loaded ingredients/profiles on the web based version to make sure they match. On the desktop you can check which add-ons you have installed by going to File->Addons. On the web based version you need to go to the individual Ingredient or Profile view and click on the Manage Preloaded button to set which ones are visible.
The reason you want these to match up is that you don’t really need to duplicate add-ons or preloaded ingredients as these are available on both systems. You only need to exchange profiles or ingredients you have customized like your equipment profile, custom mash profiles or special ingredients.
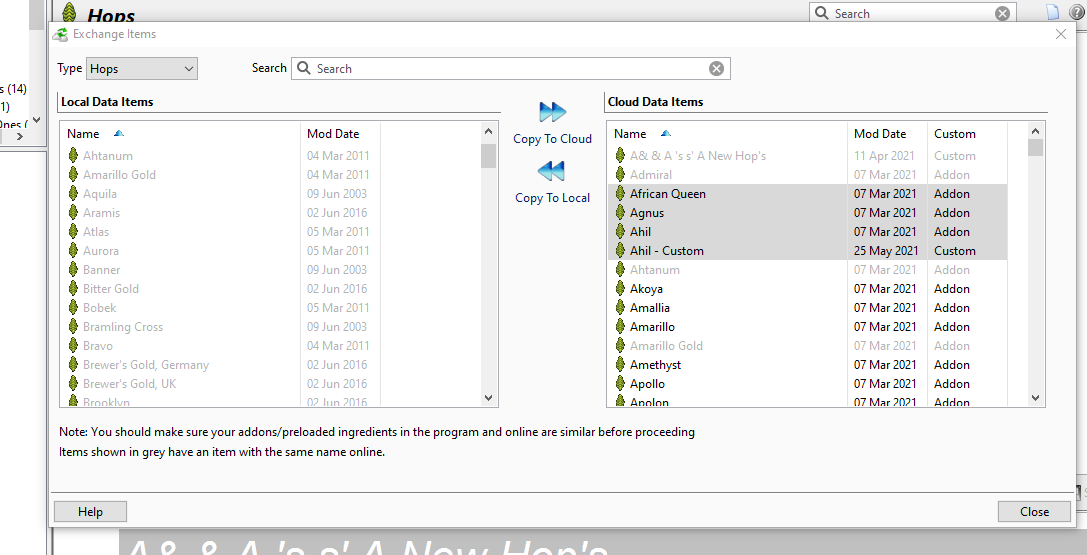
Exchanging the Data
The exchange of data must be managed from the desktop copy of BeerSmith as it needs to upload/download the data from the BeerSmith server. Lets start with exchanging a few equipment profiles.
- On the desktop go to Profiles->Equipment to show your equipment profiles.
- In that view, on the main ribbon select the Exchange Items button
- The program will display the exchange dialog (shown above) which lets you easily select items on either the desktop or the could/web server and upload or download data items.
- The items shown in grey have an item with a matching name on the other end. As items are only matched by name, this does not mean both items are exactly the same and you can still select and exchange greyed items if you wish.
- To exchange an item simply select it and then click copy to cloud or copy to local depending on which way you are going. To exchange multiple items you can use Shift-click or Ctrl-Click to select the items first and then perform the copy.
- To exchange a different type of data, go to the appropriate Ingredients or Profiles view to exchange the data of that type.
- You can use this feature to save data to the cloud and then download it to other desktop systems as well.
That is a quick summary on how to exchange data using BeerSmith 3.2 or higher. As I mentioned there is also a video tutorial on the topic here.
I hope you enjoyed this week’s article from the BeerSmith Home Brewing Blog. Please subscribe for regular weekly delivery, and don’t hesitate to leave a comment or send this article to a friend.
Related Beer Brewing Articles from BeerSmith:
- BeerSmith for the Web Released
- Transitioning BeerSmith Desktop Data to a New Computer
- Sharing Beer Brewing Data Using BSMX Files in BeerSmith
- BeerSmith Web Highlights
- BeerSmith for the Web Preview
- The “Save As Default” Feature in BeerSmith
- Back Up Your BeerSmith Data!
- BeerSmith Licensing Options Explained
Don't make another bad batch of beer! Give BeerSmith a try - you'll brew your best beer ever.
Download a free 21 day trial of BeerSmith now

{ 0 comments… add one now }