This week I present the mash temperature calculations in BeerSmith and how you can adjust your equipment profile and mash profile to hit your mash temperature the first time.
Mash Steps and Profiles
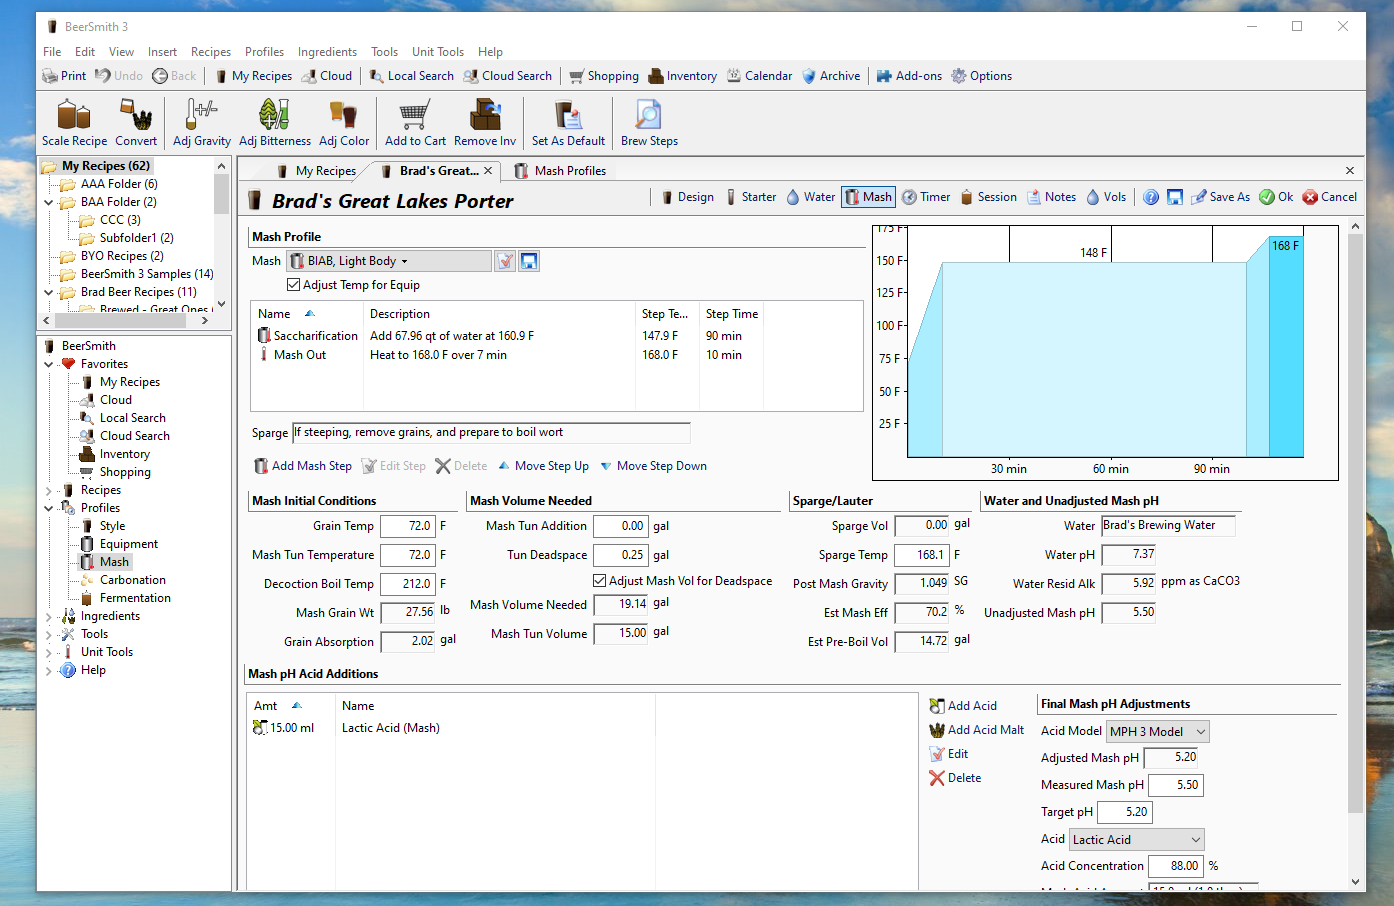
To understand the mash profile system in BeerSmith, lets start with the mash profiles themselves. You can edit and create mash profiles by going to Profiles->Mash within BeerSmith and use them in any recipe by simply selecting them. If you open any mash profile you will see that it defines the starting conditions for the mash (grain and tun temperatures) as well as a series of mash steps that define the mash. Near the bottom of the profile there are also a number of sparge options for batch sparging and BIAB/No Sparge/Full Boil mashes.
The heart of the mash profile is the mash steps. There are three types of steps. The first type is an infusion step, which is where we add hot water to the mash to increase its temperature. This is done on virtually all profiles during the first step for the mash in, and on most traditional systems additional infusions are added to achieve subsequent steps.
The second step type is a temperature step, which is used when we raise the temperature of the mash using direct heat. This is typically done on a RIMS/HERMS system and many All-in-one systems for the second and later steps as they have direct heating and circulation to raise the temperature without adding more water.
The final type is a decoction step which is used only for decoction mashes. Here a portion of the mash is removed and decocted (brought to a boil) over direct heat and then added back to the original mash. Varying the portion decocted will vary the amount of heat added.
For the remainder of this article, I’m going to focus on infusion mashing since the temperature steps are controlled by the system itself, and decoction is a fairly rare method.
Each mash step also has a water/grain ratio which defines how much water to use per pound (or kg) of grain. This determines the thickness for each mash step for each mash step. The only exception is for a BIAB style of mash where a full volume is used in the mash up front.
Infusion Mashing and the Mash In
The vast majority of modern mashes start with an infusion step. The water for the mash is heated to a fixed temperature and then the grain is mixed in to achieve the target step temperature. The starting water temperature is higher than the target temperature because some heat is absorbed by the grain and mash tun when you mash in.
Ideally the brewer wants to hit their exact target temperature at mash-in. If you are off a bit you can add some hot or cold water using the mash temperature adjustment tool.
However in the long term it is better to make adjustments to your mash profile or equipment profile so you hit your mash-in temperature. Lets look at some of the adjustments that can be made.
How BeerSmith Calculates Infusion Mash-In Temperatures
So how does BeerSmith calculate the temperature and quantity of water to use for the mash-in step? It starts by calculating the mash water needed based on the grain bill for the recipe and the water/grain ratio desired which is set in the first mash step itself. It then may adjust this amount to compensate for mash tun deadspace and also recoverable/mash tun additions. Finally for BIAB mash profiles the water/grain is ignored and instead the full volume needed to achieve the post-boil volume is used instead.
Once the water volume is set, BeerSmith calculates the amount of heat needed to achieve the first step temperature. To do this it applies the weight, temperature, and specific heat of the malt (malt specific heat is an advanced option), weight, temperature and specific heat of the mash tun (which absorbs some heat) and of course the mass and specific heat of the mash water. These are all added together to balance the heat equation and determine the infusion temperature needed for your water addition.
Per Brew: Adjusting the Mash Initial Conditions
The first item to look at is the initial conditions for the mash, such as the grain and mash tun temperatures. Since these often change depending on when and where you are brewing, you may want to adjust these for each recipe. For example brewing in the garage in the middle of winter is much different than brewing mid-summer. The easiest way to do this is to open your recipe and go to the mash tab.
There is a section there in the middle of the screen labeled Mash Initial Conditions. Here you can set the initial grain temperature, initial mash tun temperature and decoction boil temperature (if doing a decoction). The grain temperature and tun temperature do make a difference, particularly if you are brewing in the winter.
Long Term: Adjusting the Mash Tun Weight and Heat Capacity
If you find your mash temperatures are consistently high or low, you may need to adjust your mash tun weight or specific heat in your main equipment profile. To do this on a permanent basis, go to Profiles->Equipment and edit the main equipment profile you are using. You should also reselect the equipment profile and set it as the default after editing if you are using the Set as Default feature to define a default recipe template.
It is generally easier to just adjust the mash tun specific heat field. Mash Tun Specific Heat represents how well your mash tun insulates heat. A highly insulated plastic Igloo cooler might have a specific heat of 0.3 while a heat-conducting material like copper will have a low specific heat of 0.092.
The rule of thumb is if your measured mash tun temperatures are higher than your estimate, you should raise the specific heat number. If your measured mash tun temperatures are lower than the estimated, you should lower the mash tun specific heat number. You can make small adjustments and brew again until you achieve a good match between estimated and actual mash step temperatures.
That is a summary of the major mash adjustments you can make to hit your mash temperatures every time in BeerSmith. I hope you enjoyed this week’s article from the BeerSmith Home Brewing Blog. Please subscribe for regular weekly delivery, and don’t hesitate to leave a comment or send this article to a friend.