This week I take a look at how you can create custom reports in the BeerSmith desktop program. This feature is currently only available on the desktop version of BeerSmith. The process described below applies to BeerSmith 3. BeerSmith 2 had a slightly different setup where you need to copy your template to the Documents/Reports directory before adding it.
Custom Reports in BeerSmith
BeerSmith desktop uses a simple HTML format or plain text format for all of its generated recipe reports. Many users want to customize their reports to display additional information, add new instructions on brew day or display custom batch data. You can do this by starting with one of the default reports.
You can download the most popular default reports from the links here to use as a template for your custom report. Note you can right click on the link and “save as” the report to a file for editing.
- NewRecipe.htm – Current default recipe file
- NewBrewSheet.htm – Current default brew sheet (brewing instructions) file
- Competition.html – Competition recipe file
- recipetxt.txt – Current default text format recipe file
- ExtractBrewsheet.htm – Current default brew sheet (brewing instructions) file
- MeadBrewsheet.htm – Current default brew sheet (brewing instructions) file
- CiderBrewSheet.htm – Current default brew sheet (brewing instructions) file
Editing the HTML Files and Using Tags
To edit the HTM files I recommend using a simple text editor or a simple HTML editor. I don’t recommend using complex programs like Microsoft Word as they introduce a lot of HTML styling that can cause problems when you post your edited file back to BeerSmith. Even something as simple as TextEdit on the Mac or Notepad on the PC will let you view this file.
When editing the file I do recommend storing it under a different name such as “MyRecipe.htm” so you can differentiate it. You can have multiple custom reports for different purposes and some users have even created reports to print beer labels and other interesting artwork.
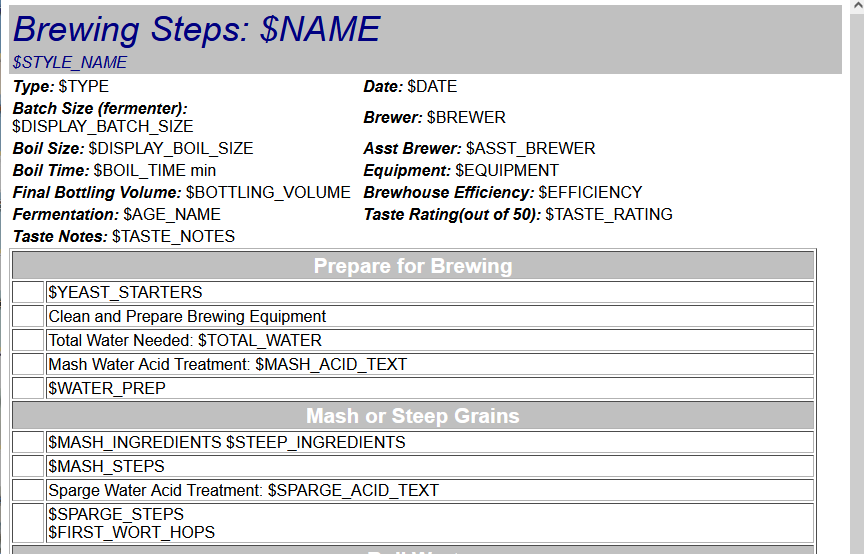
If we look at the top of the NewRecipe.html file in a simple text editor we see there is a bunch of text along with various tags. The tags all begin with a ‘$’ character and are in upper case such as $NAME. Here’s a sample below from the recipe file – $TYPE is the recipe type (All Grain, Extract, Partial Mash, Cider, etc…), $DISPLAY_BATCH_SIZE is the batch size with units, etc…
Type: $TYPE
Batch Size: $DISPLAY_BATCH_SIZE
Boil Size: $DISPLAY_BOIL_SIZE
Boil Time: $BOIL_TIME min
End of Boil Vol: $POST_BOIL_VOLUME
Many of these tags are from the BeerXML standard, but there are also over 100 custom tags you can include for just about any conceivable recipe field to display whatever you like in your report. When the report is displayed these tags are replaced with the real data.
How do you find the tags? Well we have a complete list here on the forum of tags you can use in your reports. You can also use HTML and CSS within the file to style various elements if you are familiar with those constructs. For example adding <B>…</B> around an element will make it bold.
Using Your Custom Report with BeerSmith
Lets say you have finished editing your custom report file and want to try it in BeerSmith. To add it go to Options->Reports (or BeerSmith->Preferences on the Mac) within BeerSmith. From there click on the the Add Report button and give your report a name. Next select the type (usually HTML) and finally click on the Import Template File to import your template file that you just created in the steps above.
Once you have completed that press Ok twice to save your changes, and go back to My Recipes view in the program. On the bottom half of My Recipes view you have the preview pane that shows a preview of the currently selected recipe. Select any recipe and then go to the drop down Report which is on the bar between the list of recipes and the preview window. Your newly named report should be in the list – select it now.
The program will now display your named custom report in the preview pane. You can scale it, print it or save a copy of the report from that same menu bar (splitting the preview pane and recipe list).
If you need to make changes to your template, edit the template first, and then go back to Options->Reports and select the custom report and then click on Edit. From here you can rename it or import your template again to get the latest version imported into the system.
I hope you enjoyed this week’s article from the BeerSmith Home Brewing Blog. Please subscribe for regular weekly delivery, and don’t hesitate to leave a comment or send this article to a friend.