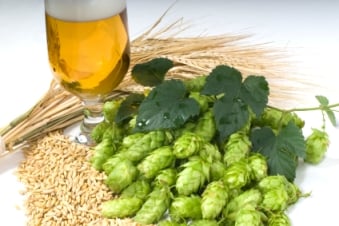
 This week we look at some good tips for all grain brewers. One of my first posts to this blog (way back in 2008) was a short article on Ten Tips for Home Brewing. It was popular at the time, but focused on extract brewers. So now, some 6 years later, I thought I would follow up with a compilation of tips for all grain brewers – here are the first five, and I’ll follow up with some more in the coming weeks.
1. Use a Single Infusion Mash
I often get questions from all grain brewers asking about multi-step mashes, cereal mashes, protein rests, and even decoction mashing. I have to ask why bother? With a few rare exceptions, a simple single step infusion mash will meet 99% of your brewing needs, and will also save you substantial time and suffering. All modern pale malt is highly modified, which means it has more than enough enzymes to convert your sugars. The only exceptions would be when working with unmalted grains such as unmalted barley, unmalted wheat, uncooked oats, etc… However even in these cases, simply substitute the flaked, torrified or quick version will allow you to go single infusion. So use flaked barley, flaked or torrified wheat or Quaker quick oats in your single infusion mash and move on.
2. Boil for 70-90 Minutes
Going all grain means moving up to a full size boil, and it also means moving up to a full length boil. Boiling does a lot of great things for your wort beyond just sanitizing it. It removes a wide variety of volatiles in your wort. For example Dimethyl Sulfide (DMS), which has a creamed corn flavor, is reduced significantly by a full length boil. Also – never cover your boil pot, as this traps these volatiles in your brew.
3. Measure your pH, and Correct it if Needed
If you want your good all grain beer to become great all grain beer, you have to control the pH of the mash. Most water is slightly alkaline and grains are acidic, but it is very difficult in advance to estimate the pH of the resulting mixture. This means you have to measure your pH during the mash (every time). It should be in the 5.2-5.4 range, but if it is not you will need to add some acid or a buffering. I have a detailed article here on how to measure and adjust your pH while mashing.
4. Use Freshly Crushed Grains
A number of years ago I had a few terrible batches of beer. It was about the same time I started buying some of my grains in bulk, but had not purchased my own grain mill yet. The cause turned out to be my crushed grains, which had been stored too long in marginal conditions and oxidized. Whole grains can be stored for years if you keep them in a cool dry place, but crushed grains can go bad in a matter of weaks. If you are serious about all grain brewing and want to buy in bulk, than a grain mill like the Barley Crusher (which we sell – full disclosure) can be indispensable.
5. Match your Mash Temperature to the Beer Style
When mashing an all grain brew, you should adjust your mash step temperature to match the body of the beer you are brewing. We generally mash between 148 and 156F (64-69 C). For clean, lower bodied beers such as a Pilsner you should target the low end of the range – around 148 F (or 64.4 C). For big, full bodied beers such as a Stout you might target the high end of the range – around 156 F (69 C). Mashing at the high end leaves more unfermentable sugars in your wort, leading to more body, while going low with the mash temperature gives you a lighter body and cleaner finish on the beer.
There are the first five tips! I plan to publish five more all grain tips soon, and I’ll post a link to that article here once the second list is live. Thanks for joining me on the BeerSmith Home Brewing Blog. Be sure to sign up for my newsletter or my podcast (also on itunes…and radio station) for more great tips on homebrewing.
Great post! I’ve just done my first all grain batch yesterday now that I feel that I have a good handle on extract brewing. After reading your post I need to look into mash pH but what I wanted to ask is why you put the boil times between 70 – 90 minutes instead of 60 minutes. I did a German Altbier and boiled the wort for 60 minutes. How do you know how long to boil for and what advantages to you get for a longer boil?
How long have grains been modified to include more enzymes? It seems like sources differ on mashing depending on how old the source is. Is there a certain point in time at which previous sources are telling us how to perform different mashes with grains that have less-sufficient enzymes? I hope that makes sense.
In other words, if I am looking through sources on brewing techniques at what point can I assume that the source is too old to be relevant with modern, modified grains?
Pingback: Five More Tips for All Grain Beer Brewing | Home Brewing Beer Blog by BeerSmith
I’m trying to get a little better efficiency out of my grain. I have a 100qt stock pot, that came withy 12inch false bottom… I’m assuming I need a bigger false bottom for my mash tun. Although I do an iodine test and it shows that I have conversion. I double batch sparge and let it sit in my mash tun, for 15 to 20 min, and I do that twice. So I believe I’m not doing it too fast. Takes me at least an hour to sparge. What can I do to improve my efficiency?
Thanks, Brad, good review of the basics, 5 important things we need to remember.