 This week we take a quick look at the new session logging features in BeerSmith 2.3. BeerSmith now gives you a single place to record your data for beer brewing including detailed fermentation data.
The BeerSmith Session Tab
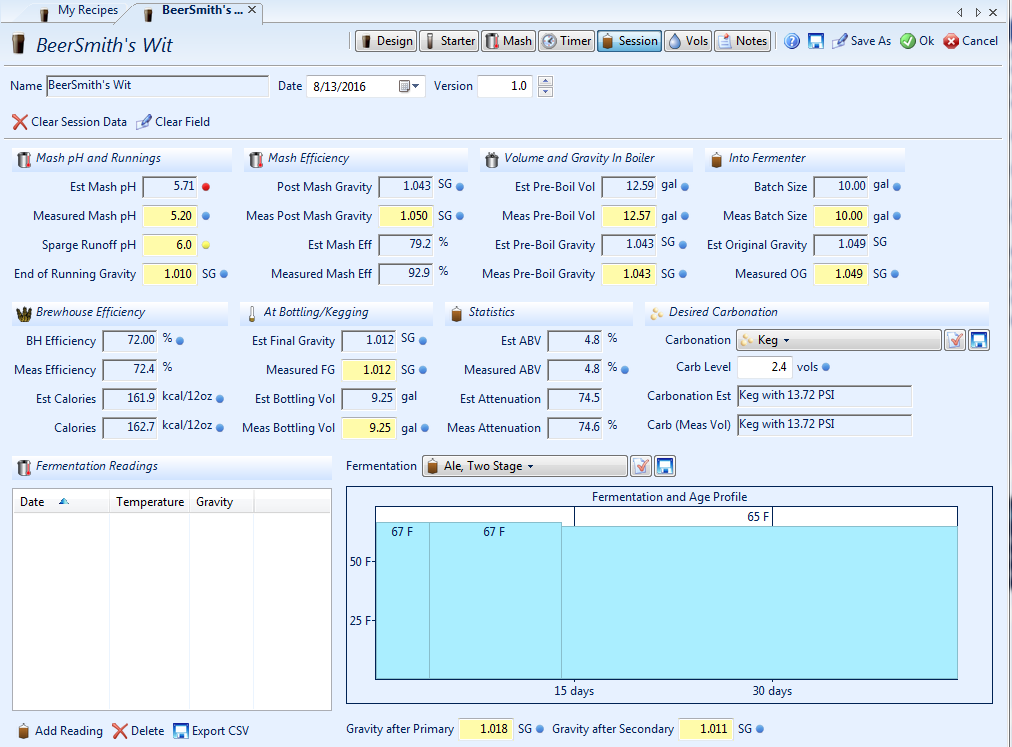
One of the many new features in BeerSmith 2.3 is the recipe session tab. Previous versions of BeerSmith had session data spread out throughout the program which made it difficult to manage and track. The new layout shows both estimated and measured values in one place so you can record your brewing session easily and compare your actual and estimated values.
To start with a new batch of beer or new recipe all you need to do is enter your recipes and go to the session tab. Note that the measured values are now colored so you can see which ones have been entered. Entered values are coded in white while those that have not yet been entered are in yellow.
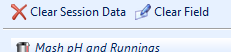 The Clear Session Data button will reset your session data in one shot if you are starting with a new brew or brewing another batch. Note that there is a brew log feature detailed in this one minute video which lets you save off old recipes “as brewed” before you brew another version or repetition of a recipe.
 Clearing the session data resets all of the session fields to yellow and also sets their value equal to the estimated values for the batch. Now as you measure and record various volumes and gravities in these fields the color will change from yellow to white so you have a clear indicator of which ones were recorded. If you make a mistake you can put your cursor on a given field and press the Clear Field button which will reset only the current field.
 As you enter session data you can compare the estimated and actual values, and also view analysis like estimated vs measured brewhouse efficiency for the batch, calories, alcohol by volume and yeast attenuation. Also new in 2.3 is the carbonation section which shows both the estimated carbonation level and carbonation based on measured bottling volumes which can make a big difference if you are bottling with a final volume that is different from the estimate.
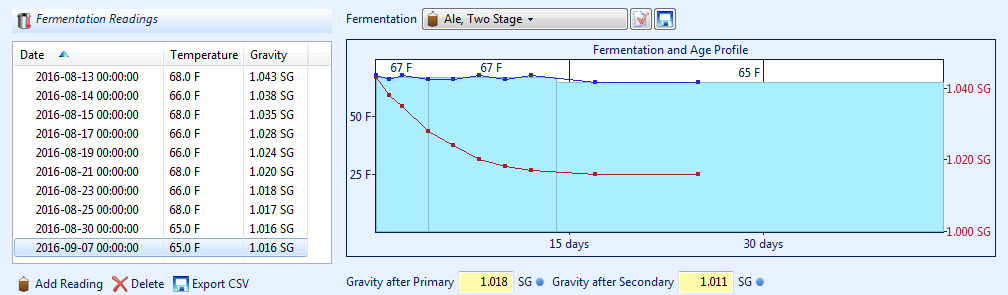 Near the bottom of the tab we’ve added space for fermentation readings. You can now record time/temperature readings during fermentation and they will be graphed on the fermentation graph. Temperature readings are shown in blue and gravity in red (using the right scale) so you can compare how your readings do relative to your original profile. Note that the fermentation graph is based on your overall brew date for the recipe so its important that you set that date near the top of the page.
So that is a quick look at the new session features in BeerSmith 2.3. I’m working to update the mobile version as well this fall to bring it up to date. Thanks for joining me on the BeerSmith Home Brewing Blog. Be sure to sign up for my newsletter or my podcast (also on itunes…and youtube…and streaming radio station) for more great tips on homebrewing. Also check out the How to Brew Video series I shot with John Palmer if you want to learn more about all grain brewing.
Really like the Fermentation and Age Profile chart! Who doesn’t love a chart?!?
Can I record many sessions in a recipe?
No,
What I do is record my data and then click the “Copy to Brew Log” button on the ribbon which will copy the entire recipe to the brew log folder. Then next time I brew I change the data, clear the session data and bump the version number so the brew log has a record of all of my “as brewed” recipe by date.
I’m considering migrating to BeerSmith from Beer Alchemy, now that you have released a Mac version. One of the features I like best about Beer Alchemy is their use of batch tracking within a specific recipe. I can make that feature work, after a fashion, by using the steps in your comment above, but what I’d really like is to have the Brew Log folder organized by recipe. I was able to create a subfolder in the Beer Log folder, but when I used the “Copy to Log” it created the copy in the root of the Brew Log folder, but I’m unable to figure out how to move the copy into the subfolder I created. For me, that capability would be a workable alternative to the batch tracking feature in Beer Alchemy. Do you have any suggestion on how to make that work? If not, would you comment on the likelihood of that capability getting added in the next release?
You can move any recipe with cut/paste or copy/paste.
Brad
Are we able to add PH and track it on the session graph?
Not currently – but it is on my “to do” list.
i am ready to brew my first batch. I have to adjust my efficiency, i can’t figure out how to do that. I have watched videos on how to do that on version 2.2 but not for this version, please help.